home best of FAQs contact
Showing posts with label DIY. Show all posts

Friday, October 7, 2011

little things #2

we made it!
It's Friday.

there's been one little thing that has made this week so much better.

Homemade Pumpkin Spice Latte.
can I get an amen?

I mean, I know starbucks sells them.
but they're just so expensive.

SO, I scoured the internet, found some way to intense recipes,
some not as good as I hoped for recpies,
and this is the mish mash of a recipe that I came up with.

I LOVE it. and want one every day.

Enjoy it this weekend friends, you won't regret it.

Homemade Pumpkin Spice Latte


1. Brew a REALLY strong cup of coffee. (I used 4 tablespoons grounds per cup).

2. Put your coffee in a sauce pan. Yep, a sauce pan.  Then, add 1-1 1/2 cups milk.  I used 2%, because that's what we drink.

3. Add a "glop" of pumpkin.  I used libby's.  I save the extra in an airtight container in the fridge for more lattes later.

4. I add in a dash of pumpkin pie spice and some cinammon.

5. Heat on medium heat until just a little steam is coming off the top. Not boiling. But, you do want to get it warm.  (If you just add the milk and pumpkin like I did the first time, it's gross.)

6. Pour into a cup and add some whipped cream on top if you like.

Enjoy!


PS. Sorry for the lack of pictures.  Everytime I made it I'm too impatent to get to the goods to mess around with a camera.
it's worth making it, I promise.
and it only takes like 3 minutes. 

Monday, September 26, 2011

DIY Chevron Rug

note: this post has a TON of pics.  sorry if you are downloading forevs. 

In my crazy pinning state, I decided we needed to make a rug.
because rugs can be really really expensive.
and I don't want to go drop $200+ on a rug.
but I want my living room to look cute, you know?

so I saw these on pinterest:
and I promptly decided I was qualified enough to make one.
my qualifications: really really wanting one. and other bloggers did it.
after some searing for stencils on line, we decided to go with the chevron.
you could use a roller on the chevron, and had to hand paint the stencil.
sorry stencil.

I'll tell you the ending now: we did it, it worked, and it's AWESOME.

here how we did it:

1. Go to ikea and get a cheap-o rug.  You want the weave to be flat (translation: non-puffy).  think flat and floppy rug.  This is the rug we got from Ikea

2. You will need 2" painters tape, floor paint, and a carpenters triangle.  You can get them all at home depot or Lowes.

3. Measuring:  Our rug was 55" wide, so we decided we wanted two "peaks" of chevron on our rug. Thus, our "midline" was at 27.5; thus, our two peaks were each 13.25 inches from the edge of the rug.
I know, I know, math in real life.  Figure out how many peaks you want for your rug, and measure. Mark where you want  your peak.


4. TAPING. Taping takes forever!  Use the carpender's triangle to get your peak for your chevron going.  I measured four inches on each arm of my triangle. The mark you made for where you want your peak will be helpful here.


You want your "stripes" to be 4" each so use two pieces of 2" tape.  Try to overlap as little as possible to prevent any length shorter than 4", but don't leave any gap (could cause issues during painting!)

To prevent having to measure each time, I used a little "jig" system.  Take two short pieces of tape, and back with a small notecard to keep them together.  This will by your 4" reference for spacing.
In picture above, I have my first row of chevron done, and have used "jig" to mark 4" to where the next row should start.  Just place your carpenter's triangle over the 4" jig's and use as a reference for your next row.

It is important to keep using the same angle when you are making your "peaks".  We used the carpender's triangle to get a 45 degree angle on each peak. Just keep taping...

When you get where you need to cut part of your tape, the method that worked best for us was using a ruler as a straight edge and a box cutter.  This is far easier than trying to cut or tear the tape straight. This will give you clean, straight edges.
EVENTUALLY, your rug will be taped.  I promise.  I messed ours up (USE YOUR CARPENTER'S TRIANGLE, PEOPLE) but Sam re-did it for me.  Taping will end.  It won't seem like it, but it will end.

Then, paint.  I used a 2" roller and it took about half of a gallon of paint.  We used floor paint.
I did a first coat, which took about 2 hours and soaked up a lot of paint, and let it dry overnight.  I finished with a second coat the next morning (much easier and only 20 minutes!)

Here's our rug reveal:


Monday, September 12, 2011

felt flower tutorial

Last fall I made my first yarn and felt flower wreath.
I loved it so much that I made 5, and we use them above the TV in the living room.

(I had already taken down one)  oops. just pretend you see the last one in that hole.


when I made them, I was still new to crafting, and was not very good.
the flowers sucked.  they were weird cone looking things.  
i sewed floral wire to the bottom of them and then pushed them into the styrofoam wreath.
hot glue now solves all of my problems.
but it was my early crafting days.  i was thrilled.


about a month ago, I sat looking at the flowers and really hated them.
so, I started re-making all of the flowers.  
here's how to do it.

First, cut circles out of the color felt you want.  
cut as many circles as you want, in any size.
don't worry if they aren't perfect circles. mine are far from real circles.

then, cut a spiral in your circle.  
you want to have pretty thick "strips" in  your spiral.

once you have your strips cut, you have to "scallop" your felt.
to scallop, first lay out your felt in a circle (like it was before you cut it).  
this makes it easier to find the outside edge.


start at the outside edge, and start cutting scallops along the felt.
you want to make pretty high mountain tops, and pretty low valleys.
scallop the whole circle of felt.

once you have finished scalloping, you need to roll your flower.  Start at the center of the circle, and fold and roll.  Use a dot of hot glue every few turns to secure.

horray! much prettier felt flowers.
now...it looks so much better and so much more ready for fall in my house!


Monday, July 11, 2011

DIY laundry and dish soap

If you are anything like me you love pinterest and crafts.
and you might cringe at spending gobs of moolah on laundry and dish soap.
because that extra $15 gets closer to a pedicure.
and pedicure > soap.
so, based on some ideas from pinterest, this is my version of how to make your own laundry and dish soap.
it's a great weekend project (that you can do in less than an hour!) once you have your supplies, that is.

so, here is how you can make your own laundry and dish soap and put those pennies toward the pedicure instead.


These are all the supplies you will need: (to complete both soaps)
From left to right: 
  1. white vinegar
  2. washing soda (Arm and Hammer brand, but NOT baking soda. I found mine at Kroger.)
  3. Kosher Salt
  4. Lemi-Shine  (you will find it near dish soaps in most grocery stores)
  5. Borax.  (Target sells it, as does Kroger)
  6. Fels Naptha soap bar. (I forgot to add it to my picture)
DIY Dish Soap
 2 cups  borax
2 cups washing soda
2 cups lemi shine
1 cup kosher salt

Mis all ingredients together.  Make sure to stir many times for the first 2-3 days (2-3 times a day).  If not, your powder will form a solid lump and you will have to use a knife to break it up.  There will be small "balls" in your powder, but they are just fine.  Use 1 tablespoon per load.

Cost per load: about 3 cents!


I used an old coffee container as my dish soap container


Liquid Laundry Soap
3 pints water
1/3 bar Fels Naptha soap, grated
1/2 cup Washing Soap
1/2 cup Borax
2 gallon bucket to mix it in (one with a spout for pouring is best)
1 quart really HOT water

Mis grated Fels Naptha soap in saucepan with 3 pints hot water and leave on low heat until all soap is COMPLETELY dissolved.  This may take a while (10+) minutes, but you want to make sure the soap is completely dissolved.

 Stir in washing soda and borax.  Stir until thickened, and remove from heat.

Add 1 quart hot water to your 2 gallon bucket.  Add soap mixture, and mix well.

Fill bucket completely with addditional hot water, and mix well.  Set aside for 24 hours, until mixture thickents.  You can add additional hot water is your mixture becomes too thick.

Your soap may gel, but do not worry.  Just give it a good shake before you use it each time and it will be fine.  Use 1/2 cup mixture per load.  This makes around 64 loads, and your cost per load is about 3 cents!! 

Happy soap making.

Tuesday, July 5, 2011

Weekend Update

I hope you all had a great 4th of July weekend. 
Here in the Battershell household, we had craft a palloza.
I tackled a lot of the things I had been wanting to make, and had my Mom in town to help! 
Friday I found all the materials to make homemade dish soap and laundry soap.
After searching all over, my local Kroger had every supply I needed.


We are now paying less than .03 cents a load for all of our laundry and dish washing.  Horray! (and I just noticed, yes that is Sam in the background behind all my ingredients...he is hardcore playing video games)

When Mom arrived, she brought her sewing machine and we were able to make some new napkins.  Go ahead, enjoy the gingham. Oh, and yes, I did get that fabric on clearance from hobby lobby.


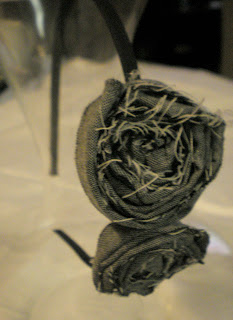
And rosettes.  I have been a rosette factory this weekend.  Saturday night we went to a Houston Astros game and I sported my favorite, the coral rosette headband.  I am in love.


and the really big news:  over the weekend I have officially opened my etsy shop! You can check out all my goodies here.  You too, can have as many rosettes as your heart desires without breaking the bank. 

These are some of the goodies for sale


Happy Tuesday!  Go buy some rosettes.

Wednesday, June 29, 2011

friday, come sooner

I have friday off this week.
so of course, it's dragging it's heels to get here.

I have so much I want to do with a whole day off!
is it just me that plans time off?
someone, tell me it's not just me.

First, I want to make these kale chips.
Samuel and I both love veggie chips, and it would be so much better to make them and not pay for them.
and, I would know exactly all the ingredients that are in them. 

Then, I need to make a ton of rosettes.
Paint my nails like this:
make some handmade laundry soap and dish soap
and I am dead set on finding some good garage sales around Houston.  I want to get some cute stuff to add to my DIY projects. 

and if there is still time in this crazy day a little time by the pool wouldn't hurt.

Thursday, June 23, 2011

can you be in love with a craft?

because I really think I am.
I think about these little beauties at work.
and I just want to make them all night long.
In lots of colors, on headbands, on necklaces.
I think I'm in craft love.


 Um, yes, I did wear my hair to work curly today just so I could have more time in the morning to work on the rosettes.   And yes, I purposely cranked out my first headband so I could wear it.  And, yes, I am also very very happy because I have the cutest hair accessory at the office, why thank you.
 I will show the other fabrics from HL some love, but these are my favorites for now.

 =)


Don't forget to go win yourself a little something something over here.

Monday, June 20, 2011

Weekend Recap

This weekend in our neck of the woods was hot.
Nice, but hot.
We are thankful for air conditioning.

Saturday morning we relished in our favorite relaxing activities--drinking coffee while the husband plays some video games; then a trip to the grocery store. 

We were also celebrating 6 months of marriage--it's gone so quickly so far and the husband bought me some absolutely beautiful peonies.  He knows how to speak my language.  No, those aren't a postcard.  They are sitting on my table.


Saturday afternoon he left me craft for a few hours.  I have been seeing a lot of fabric rosette headbands, neckalces, etc and I am in la la love with all of them.  But, the budge doesn't let me buy as many necklaces as my heart desires, so I decided I would try to figure them out.  After a few hours of work, and some patience...my rosettes went from this:
After 5 tries, I was satisfied..and moved on to the real fun--making the necklace.

I am so pleased with how it came out!!


It was a wonderful weekend.  How were things in your neck of the woods?
Don't forget to enter the giveaway!!

Tuesday, May 3, 2011

Crafts

Confession:
I am a blogger now. Although to my husband this fact is embarassing.
Not that all my blog posts previous to this were not sufficient to make me a blogger.
But now I think "I need this picture for the blog".
Or "I wonder how I can make the blog cuter"
It's not just I like to write my random thoughts just for mom to read (but thanks for reading, Mom!)
But I enjoy learning the HTML and widgets and formatting stuff like that.
And I have blogs I love love love.
And some of those ladies can make some pretty incredible crafty stuff...(yes, Mom, that includes you!!)

So...I thought I would share a few of the projects I will attempt to tacke in the next....while

1. Hoop frames
Aren't they adorable??  You get to pick your fabric, can easily change the photos as you choose, and they are simple!  And for those of you who love photos like I do...you won't blow your whole budget on frames!!  

2. Date your mate
This cute little idea is from the blog dollar store crafts.  All you need is a deck of cards, sharpie, whole punch, and two rings.  How easy is that?  Oh yes, and you need a wonderful husband to love on.  Check, check, check.  Samuel, act surprised when this little goodie shows up in  your lunch one day.

3. Headbands
Out of all of my crafts...this looks the hardest, and is probably just me dreaming away and will never really happen.  But come on, maybe one day??